We always say nail polish application is a moment for you- a moment to relax and practice self-care. You shouldn’t focus too much on perfection but rather on the moment, reflecting, and being present. Applying nail polish should be a stress-free process but many of us find ourselves wanting a seamless salon-grade mani at home that when we see a smudge we can’t help but obsess over it. Lucky for you, we’re sharing a few nail polish application tips to make your manicure a stress-free process – all smudge-free!
This blog includes:
- How to properly apply nail polish
- Techniques for nail painting
- A how-to video for a smudge-free manicure
- Types of nail products to use
- Benefits of nail products used
- Nail polish drying times
Step 1: Prep your nails
Every masterpiece starts with a perfectly clean and primed canvas. To make your mani application easier we recommend you thoroughly clean your nails of any oils with a cotton pad and nail polish remover and then properly clean your nails after removing nail polish. Oily skin derived from other products used like nail polish removers will make nail color chip easily and not stick to the nail. Don’t skip out on your cuticle care! Applying a drop of cuticle oil and pushing your cuticles back with a flat side of a wooden stick will not only help to hydrate the area but prep for a clean nail plate.
Step 2: Apply your base coat
Clean the polish brush on the sides of the polish bottle allowing just enough base coat to stay on the brush. Apply a thin layer of base coat to each nail and allow it to dry for about 2 minutes.
Learn more about how long it takes nail polish to dry.
The benefit of using a Base Coat: Before painting your nails, always make sure to use a base coat – the base coat creates a great foundation for the polish to grab onto. Applying nail polish color directly to nails will not only cause your nails to chip quickly, but it can actually stain your nails.
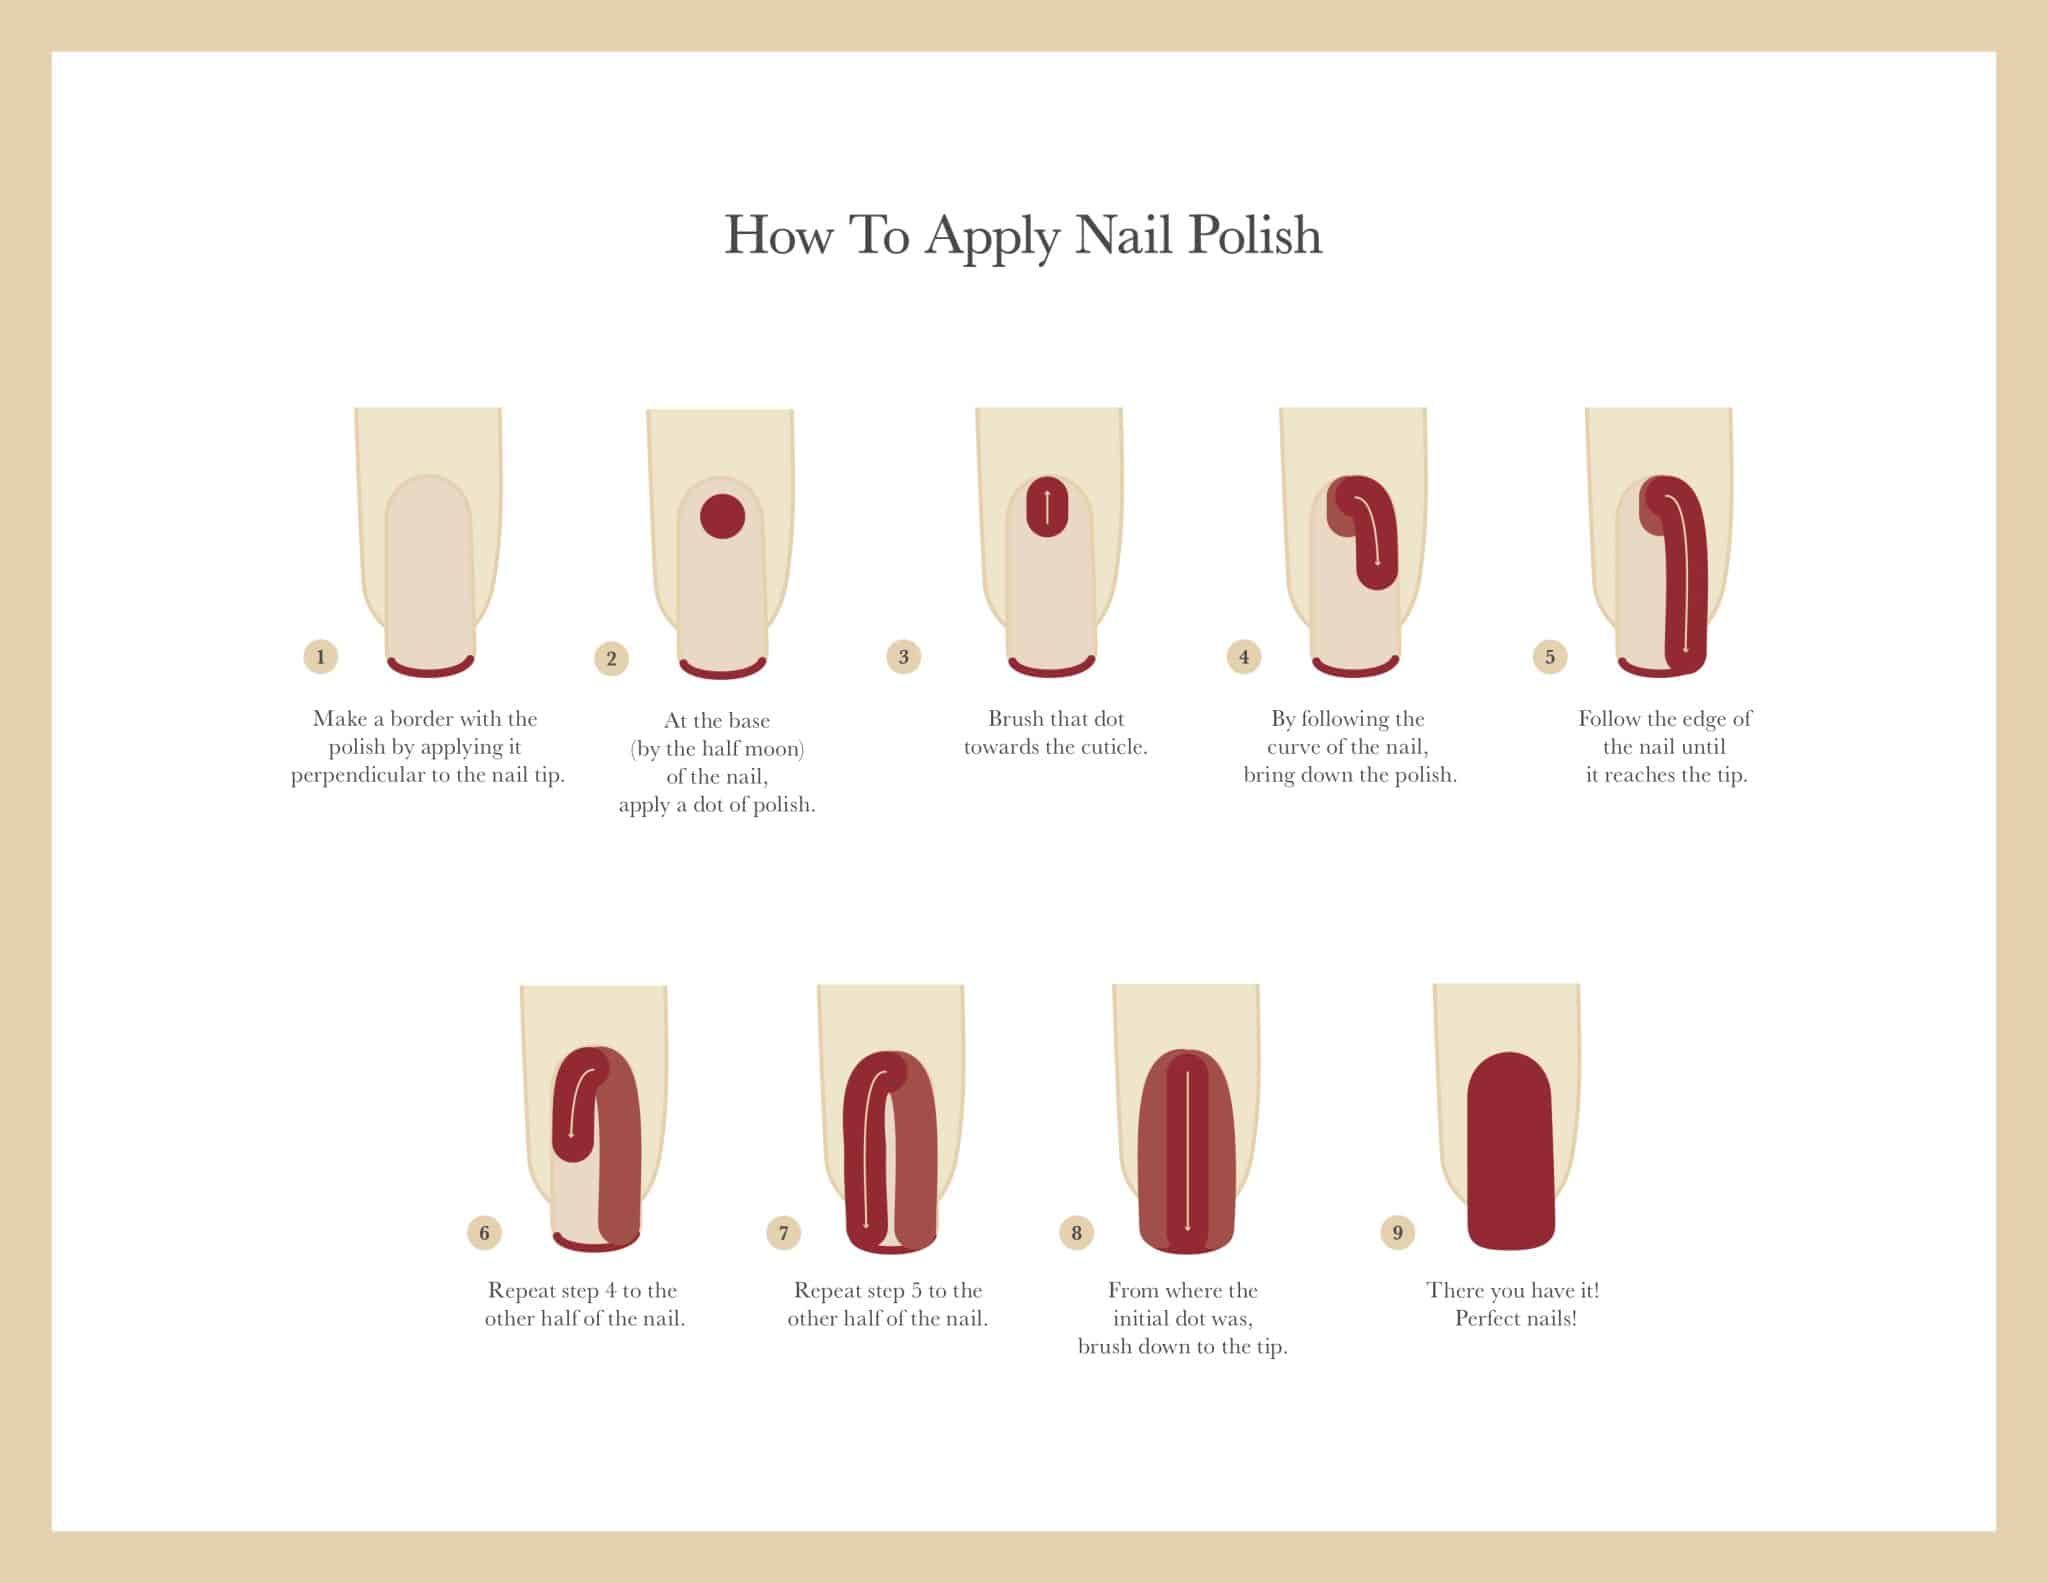
Step 3: Apply your nail polish
Before you even start applying, make sure you don’t have too much polish on your brush. Swipe one side of the polish brush on the side of the polish bottle leaving one side clean and the other with a layer of polish. The first step is almost like giving yourself a French mani. It involves lightly swiping the top of your brush against the tip of the nail.
Once you apply your first polish layer, make sure you allow enough time for it to dry. We recommended at least 2 minutes.
Step 4: Apply your second layer
After your first layer dries, repeat step 3 to make your nail polish more vibrant. After you apply your second layer of polish, allow another 2 minutes of drying time.
Step 5: Apply your top coat
After your polish dries a bit, apply a thin layer of your top coat and allow another 10-15 minutes to completely dry your mani.
Voila! Smudge-free mani at your hands!
The benefit of using a Top Coat: Be sure to use a premium top coat after you polish – the top coat will create a barrier to the elements and help prevent chips and prolong the vibrancy of your polish color. Re-apply the top coat every 2 to 3 days to preserve the vitality of the color and ensure a continuous protective layer that helps to prevent chipping.
If you want more of a visual demonstration, watch our video below for a step-by-step nail polish application!


